Are you captivated by the breathtaking beauty of the Northern Lights and eager to capture their essence with your camera? Look no further – this ultimate guide will transform you into a pro at photographing this awe-inspiring natural phenomenon.
From finding the best locations to choosing the right camera settings, we’ll walk you through every step of the process. Whether you’re a beginner or an experienced photographer, our expert tips and tricks will help you capture the magic of the Northern Lights like never before.
With our comprehensive guide, you’ll learn how to anticipate the best times to witness this celestial show, how to compose stunning shots, and how to make the colors of the lights pop in your photographs. Additionally, we’ll provide advice on the best equipment to use, including recommended lenses and tripods.
Unlock the secrets to mesmerizing Northern Lights photography and create images that will leave a lasting impression on anyone who sees them. Let’s embark on this journey together and make your photography dreams come true.
Understanding the Northern Lights phenomenon
The Northern Lights, also known as Aurora Borealis, are a natural light display that occurs in the polar regions. This mesmerizing phenomenon is caused by the interaction between charged particles from the sun and the Earth’s magnetic field. When these particles collide with the gases in the Earth’s atmosphere, they produce beautiful colors that dance across the night sky.
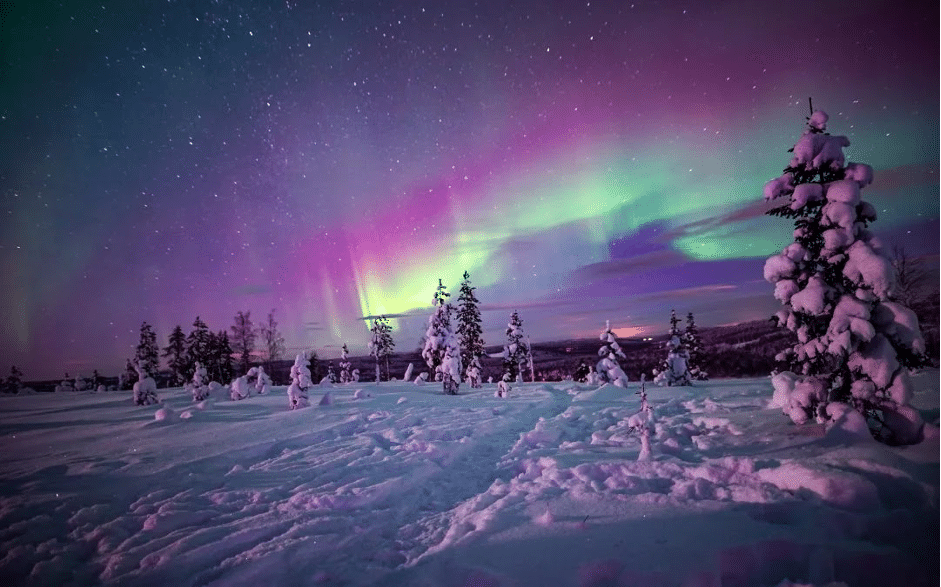
To capture the Northern Lights in all their glory, it’s important to understand their behavior. The lights can appear in various shapes, sizes, and colors, ranging from green and yellow to pink and purple. They can also move and change intensity rapidly, creating a dynamic and ever-changing spectacle.
Photographing the Northern Lights requires patience and careful observation. It’s essential to monitor the local weather conditions and solar activity to increase your chances of witnessing this celestial show. Keep an eye on the Aurora forecast, which predicts the likelihood of Northern Lights activity in your area. By staying informed, you can plan your photography sessions accordingly and be in the right place at the right time

Best locations for photographing the Northern Lights
Choosing the right location is crucial when it comes to capturing stunning Northern Lights photographs. While the lights can appear in various regions, some places offer better opportunities than others. Here are a few prime locations to consider:
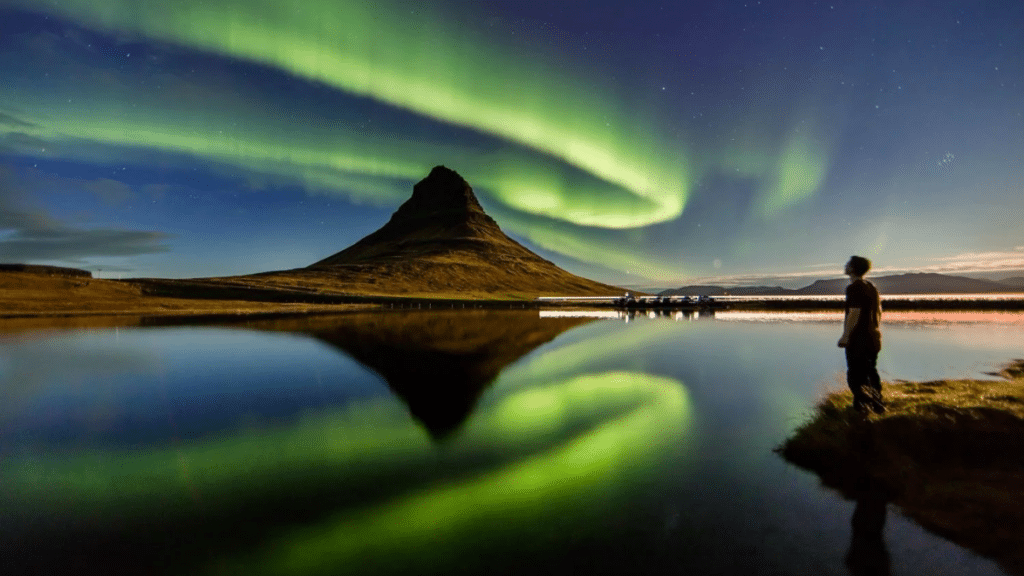
Iceland: Known for its dramatic landscapes, Iceland offers a perfect backdrop for Northern Lights photography. The country’s remote locations and minimal light pollution provide excellent conditions for capturing the lights in all their glory.
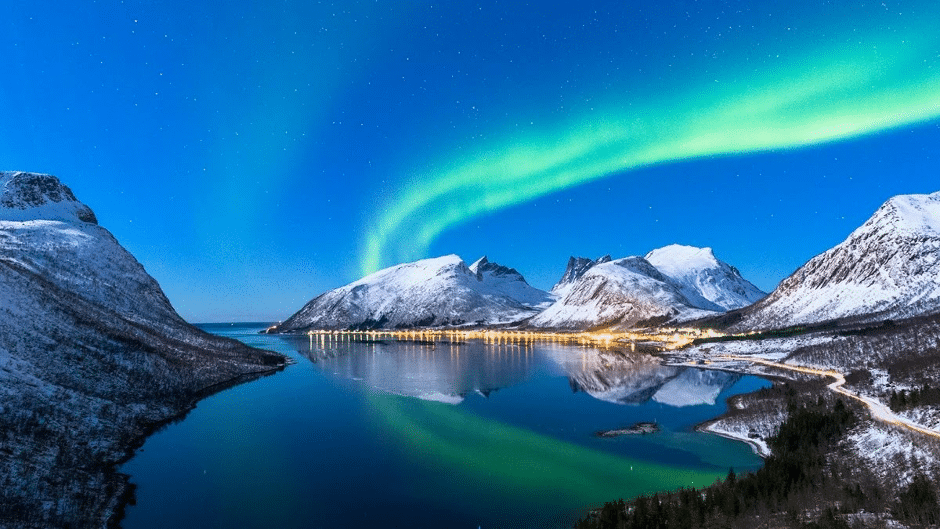
Norway: With its incredible fjords and picturesque landscapes, Norway is a popular destination for Northern Lights enthusiasts. The northern regions of Tromsø and Lofoten Islands are particularly known for their frequent Aurora sightings.
Canada: The vast wilderness of Canada provides ample opportunities for photographing the Northern Lights. Places like the Yukon Territory, Yellowknife, and Churchill are renowned for their clear skies and breathtaking displays of the lights.
Remember to research and plan your trip well in advance, considering factors such as accessibility, weather conditions, and accommodation options. Additionally, be prepared to venture out of cities and into more remote areas where light pollution is minimal.
Essential equipment for Northern Lights photography
To capture the Northern Lights like a pro, it’s important to have the right equipment. Here are the essentials you’ll need:
Camera: A DSLR or mirrorless camera with manual controls will give you the flexibility to adjust settings for optimal results. Look for a camera with a good low-light performance and a wide dynamic range.
Lenses: A wide-angle lens is ideal for capturing the vastness of the night sky and the Northern Lights. Look for a lens with a fast aperture, such as f/2.8 or wider, to allow more light into the camera sensor.
Tripod: Stability is crucial for capturing sharp and detailed images of the Northern Lights. Invest in a sturdy tripod to keep your camera steady during long exposures.
Remote Shutter Release: Using a remote shutter release or an intervalometer will prevent any camera shake caused by pressing the shutter button. This ensures sharper images during long exposures.
Extra Batteries and Memory Cards: Cold temperatures can drain your camera’s battery faster than usual. Always carry spare batteries and memory cards to avoid missing out on capturing the lights.
By having the right equipment, you’ll be well-prepared to capture the magic of the Northern Lights and create stunning photographs that truly showcase their beauty.
Camera settings and techniques for capturing the Northern Lights
Now that you have the right equipment, let’s dive into the camera settings and techniques that will help you capture stunning images of the Northern Lights. Here are some tips to get you started:
Manual Mode: Set your camera to manual mode to have full control over the exposure settings. This allows you to adjust the aperture, shutter speed, and ISO according to the lighting conditions.
Wide Aperture: Open up your lens to its widest aperture (lowest f-number) to let in as much light as possible. This will help you capture the vibrant colors and details of the Northern Lights.
ISO Sensitivity: Start with an ISO setting of around 800-1600 and adjust accordingly. Higher ISO values allow for faster shutter speeds but may introduce more noise in the image.
Shutter Speed: Experiment with different shutter speeds to capture the movement and intensity of the Northern Lights. Start with a shutter speed of around 10-15 seconds and adjust as needed.
Focus: Switch your lens to manual focus mode and set the focus to infinity (∞) or slightly before. This will ensure that the Northern Lights appear sharp and well-defined in your images.
Exposure Bracketing: To capture a wider range of tones and details, consider using exposure bracketing. This technique involves taking multiple shots at different exposures and blending them together during post-processing.
Remember to continuously review your images during the shoot and make adjustments as necessary. The Northern Lights can be unpredictable, so it’s important to be adaptable and experiment with different settings to achieve the desired results.
Tips for planning and timing your Northern Lights photography trip
Planning and timing are key when it comes to successful Northern Lights photography. Here are some tips to ensure your trip is as productive as possible:
Aurora Forecast: Keep a close eye on the Aurora forecast to determine the best times to witness the Northern Lights in your chosen location. Websites and apps dedicated to Aurora predictions can provide valuable insights into solar activity and geomagnetic storms.
Moon Phase: Consider the moon phase when planning your photography sessions. A new moon or a moonless night allows for darker skies, enhancing the visibility of the Northern Lights.
Weather Conditions: Monitor the weather conditions leading up to your trip. Clear skies are ideal for capturing the Northern Lights, so aim for periods of minimal cloud cover.
Patience and Persistence: Keep in mind that the Northern Lights don’t always appear on demand. Be patient and allow yourself ample time for multiple photography sessions. Persistence often pays off with breathtaking displays.
Composition: Pay attention to the composition of your shots. Incorporate interesting foreground elements, such as mountains, trees, or bodies of water, to add depth and context to your Northern Lights photographs.
Remember, the journey of photographing the Northern Lights is as important as the end result. Embrace the experience, enjoy the beauty of nature, and let your creativity guide you.
Editing and post-processing tips for enhancing your Northern Lights photos
After capturing the Northern Lights, the post-processing stage allows you to enhance the beauty and impact of your images on wdbos. Here are some tips to help you make your Northern Lights photos truly shine:
RAW Format: Shoot in RAW format to retain maximum image information. This will give you more flexibility during post-processing to adjust exposure, white balance, and other settings.
Color Correction: Adjust the white balance in your images to accurately represent the colors of the Northern Lights. Experiment with temperature and tint sliders to achieve the desired color balance.
Exposure and Contrast: Fine-tune the exposure and contrast to bring out the details in the Northern Lights. Be careful not to overdo it, as excessive adjustments can lead to unnatural-looking images.
Noise Reduction: High ISO settings can introduce noise in your images. Use noise reduction tools in post-processing software to reduce noise while preserving details.
Selective Adjustments: Make selective adjustments to specific areas of your image, such as boosting the saturation of the Northern Lights or enhancing the shadows and highlights.
Creative Editing: Feel free to experiment with creative editing techniques to add your unique style to the Northern Lights photographs. Consider adding a subtle vignette, adjusting the clarity or adding a touch of selective color.
Remember, post-processing is a personal preference, and there are no hard and fast rules. Trust your creative instincts and let your vision guide you in creating stunning Northern Lights images that reflect your unique style.
Safety precautions and considerations for photographing in extreme conditions
Photographing the Northern Lights often involves venturing into extreme conditions. It’s important to prioritize your safety and be prepared for any challenges you may encounter. Here are some safety precautions and considerations to keep in mind:
Dress Appropriately: Layer your clothing to stay warm and comfortable in cold temperatures. Opt for thermal base layers, insulating mid-layers, and a waterproof outer layer to protect yourself from the elements.
Footwear: Wear insulated and waterproof boots to keep your feet warm and dry. It’s essential to have proper footwear that provides good traction on icy or slippery surfaces.
Gloves: Invest in high-quality gloves that offer both warmth and dexterity. Look for gloves designed for photography to allow you to operate your camera controls easily.
Headlamp or Flashlight: Carry a headlamp or flashlight to navigate in the dark and to assist in setting up your camera and equipment.
Batteries: Extreme cold can drain your camera’s battery faster than usual. Keep your spare batteries warm by storing them close to your body or using battery warmers.
Emergency Kit: Carry a basic emergency kit that includes essentials such as a first aid kit, a survival blanket, hand warmers, and a fully charged mobile phone.
Always check the local weather conditions and heed any warnings or advisories in the area you plan to photograph. Familiarize yourself with the potential risks associated with extreme cold and take necessary precautions to ensure your safety throughout the photography session.
Capturing the magic of the Northern Lights through photography
Photographing the Northern Lights is a truly magical experience. With the right knowledge, equipment, and preparation, you can capture the essence and beauty of this celestial spectacle like a pro.
From understanding the Northern Lights phenomenon to choosing the best locations and camera settings, this guide has provided you with the tools and tips to embark on your Northern Lights photography adventure. Remember to plan ahead, take your time, and embrace the unpredictable nature of the lights.
Now, armed with this comprehensive guide, it’s time to go out and capture the mesmerizing Northern Lights through your lens. Unleash your creativity, experiment with different techniques, and create photographs that will leave a lasting impression on anyone who sees them. Let the magic unfold as you embark on this awe-inspiring photography journey.


