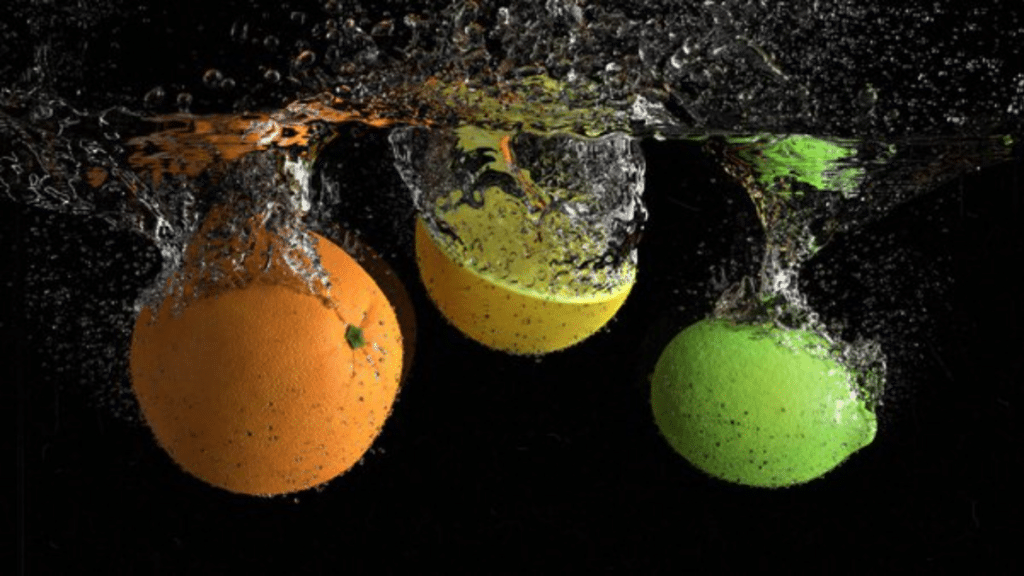
Photorealism has long been both an artistic challenge and technical milestone within the 3D rendering world. However, with the advent of AI tools for 3D production, high quality 3D scanning, abundance of online models and materials, faster unbiased render engines, and accessibility of render farms, achieving physical accuracy and surface-level replication is now much more accessible than ever before.
But while perfectly replicating the qualities of real materials, lighting and textures is already a big task in its own right, there exists another critical component that separates mere replications from truly immersive and convincing virtual scenes – how believable they are as actual photographs.

A render may impress with its surface-level accuracy, yet still leave viewers questioning its authenticity due to a lack of accounting for factors that are almost unnoticeable, but.sensed by our subconscious mind.
In this article, we will explore how the subtle element of believability differs from technical realism, and try to infuse this natural sensibility in a simple scene.
Establishing Context:
The first thing we need to consider is the context of our subject, or why it was made a subject in the first place. Since the goal is to simulate a photograph, it helps to get a sense of the photographer’s motives. Whether epic or mundane, the more developed our idea is of the scene we are going to make, the better our result will be.
For example, let’s decide we want to start with something simple- maybe a casual picture taken from a smartphone. The person who took the photo might just want to give her friends on social media a glimpse of her Sunday morning agenda – some leisurely reading! From this little exercise, we’ve already established key information that will help us determine what we’ll be rendering, and how we’ll be presenting it:
Subject/s: A book or two, and a mug of coffee
Setting: Indoors, morning
Composition: portrait orientation, using the dimensions of an image taken from an iphone.
Understanding The Natural World
Let’s say with a little online foraging and some simple modeling,texturing and lighting, we have built our scene and are ready for the first render.
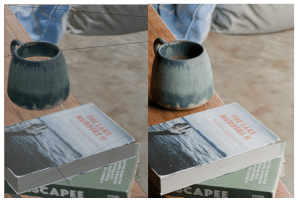
Left: the scene inside of Blender with Viewport Shading enabled. Right: The render.
While the props look as though they could exist in reality, something about the image prevents us from being fully immersed. Even though the objects in our scene possess the natural characteristics of their physical counterparts, they currently exist in a vacuum. There is nothing outside of the elements present in the frame.
If this image were taken from a real indoor space, there would be signs of natural phenomena at play. We might see shadows from the windows where the sunlight filters through, slight traces of color inherited from the surroundings- the air itself would leave traces of its presence by the way the light interacts with microscopic particles like dust.
In the pursuit of replicating these natural phenomena in a 3D environment, several techniques are employed. An HDR (High Dynamic Range) map is used to simulate the slight traces of color inherited from the surroundings, creating a more realistic lighting environment that reflects the complexity of real-world light sources.
Shadows from the windows where the sunlight filters through are added with textured lights known as Gobos. These Gobos project complex shadow patterns, adding depth and visual interest to the scene. A main light source is added to the scene, and the hardness of the Gobo lights is adjusted to control the sharpness of the shadows they cast, mimicking the way sunlight filters through windows. Finally, to capture the subtle presence of air as seen in the way light interacts with microscopic particles like dust, volumetrics are added, enhancing the realism of the scene by creating a sense of depth and atmospheric immersion.
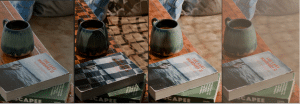
From Left to Right: 1.Using an HDR map to simulate light and color changes from surroundings 2.Adding shadows with textured lights known as Gobos, 3. Adding a main light source and adjusting the hardness of the Gobo lights. 4.Adding Volumetrics.
Remembering the “Photo” in Photorealism
One of the most important aspects of photorealism is to emulate the behavior of the camera and the photographer behind the camera. After all, photorealism is not just about making 3d renders look like real objects, but also making them look like real photographs. This means that we need to pay attention to how a real camera would capture our scene.
We’ve tried to adhere to more natural camera positioning and set our image proportions, focal length, and depth of field to match the camera we are trying to simulate, but we can also use lens correction in software like Photoshop or Lightroom to more closely replicate the effect of a particular camera model. In some cases, adding chromatic aberration can help sell the final image even more.
Chromatic aberration is like seeing a slight rainbow edge around objects in a photo. It happens because the camera lens acts a bit like a prism, bending different colors of light by different amounts. This means all the colors don’t line up perfectly on the camera sensor, causing the “fringes” of color. This is normally an effect that modern cameras and editing software are good at minimizing, but it can add a more photographic quality to 3D renders in the right amount.
It’s more noticeable where there is high-contrast, like the edge of our book’s cover design against the white peel beneath. Blender’s Compositor’s Lens Distortion node provides a Dispersion parameter that allows us to control the intensity of the chromatic aberration. We can also add some post-processing effects such as color grading, vignetting, noise, grain, etc. to enhance the photographic feel of our image.
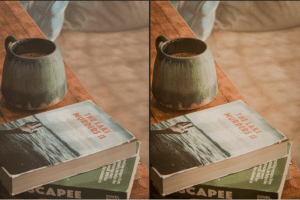
Left:The render with initial post processing. Right: The render with additional lens correction, chromatic aberration and post processing.
On Subtlety
While adding details and enhancements can improve our image’s realism, we should also be careful not to overdo it. To create an appealing image, we will inevitably make stylistic decisions- whether it be in adding additional light sources or enhancing texture detail on a model, or in post processing, but we would do well to make sure our enhancements do not take away from the naturalism in the scene. We can make changes in small increments and give our eyes time to rest and view our work anew.
By following these tips and tricks, you will be able to create stunning photorealistic images that will impress your viewers and yourself. Remember that photorealism is not only a technical skill but also an artistic one. Experiment with different settings and techniques until you find what works best for you and your vision.to be able to see your changes with fresh eyes. Sometimes less is more, and a subtle touch can make a big difference.
Closing Thoughts
While replicating reality with perfection may be an endless pursuit, understanding the interplay between the technical and artistic aspects of photorealism allows creators to strike an appealing balance. With patience and an observant eye, subtle nuances can transform a virtual scene into a convincingly lifelike one. But the journey itself also holds rewards, as each newly perceived detail or tweaked setting grants deeper insight into both the natural world and our craft. For artists, the aspiration for physical accuracy might best be seen not as a destination but as a lifelong study – one that alongside technique, cultivates an appreciation for beauty in all its subtle forms. With experience and experimentation, virtual worlds may approach reality in spirit as much as in surface, enriching both viewer and creator alike. The possibilities for photorealism, it seems, are as endless as observation of life itself.

